Pumpkin season is here and with it brings a flurry of pumpkin-flavored goodies to the stores. Each year, there’s always some brand jumping on the bandwagon and introducing a limited edition pumpkin spice flavor to their lineup, and I am here for if it’s vegan and gluten-free! But nothing beats the smell and taste of freshly baked pumpkin muffins in your own kitchen. Although I must admit that I don’t bake very often. It’s not that I don’t enjoy it…I do. It’s just that baked goods are my kryptonite. All my willpower goes out the door when there’s a warm batch of something freshly baked in my kitchen…then I’m eating it for breakfast, lunch, and dinner. I justify it by telling myself that there isn’t any refined sugar in my baked goods and that they are gluten-free and vegan. Practically health food. That’s my rationale and thought process with eating it at every meal until it’s gone. That’s why I don’t bake very often.
As much as I try avoiding baking, my kids do love when there are freshly baked cookies or muffins in the house, so I do it for them occasionally. A favorite hack of mine was buying the Trader Joe’s pumpkin loaf mix in the box and using an egg replacer and vegan chocolate chips. They only have it in the fall and I would buy a large stash to last through the winter months for my kids to make. It was perfect too because the mix isn’t gluten-free…so I couldn’t eat it despite how wonderful they smelled. But over the past few years, some of my kids have developed a similar gluten allergy to mine and I decided it was time to make my own gluten-free pumpkin muffin mix. So here it is! It can be a little tricky baking with gluten-free flours and still achieving the right fluffy and moist cake-like muffin. In my experience, using a mix of oat flour and almond flour gives the right consistency and fluffiness. I have played around with other gluten-free flour mixes and have had quite a few failures because they tend to create a very dense cake that tastes kind of funky. The combination of oat and almond adds a nice sweetness and will give your muffins, breads and cakes the right texture! Trust me here!
Ingredients
- 2 Cups Oat Flour
- ½ Cup Almond Flour
- 2/3 Cup Coconut Sugar
- 1/3 Cup Unrefined Granulated Sugar
- 1 Teaspoon Baking Soda
- ½ Teaspoon Baking Powder
- ¼ Teaspoon Salt
- ½ Teaspoon Cinnamon
- ½ Teaspoon Nutmeg
- 1 Can Pumpkin Puree
- ½ Cup Maple Syrup
- 1/3 Cup Almond Milk
- 1 Teaspoon Lemon Juice
- 1 Teaspoon Vanilla Extract
- ¼ Cup Avocado or Olive Oil
- 2 Tablespoons Bob’s Red Mill Egg Replacer (or 2 TBSP Flax Meal)
- 5 TBSP Water (For the Egg Replacer)
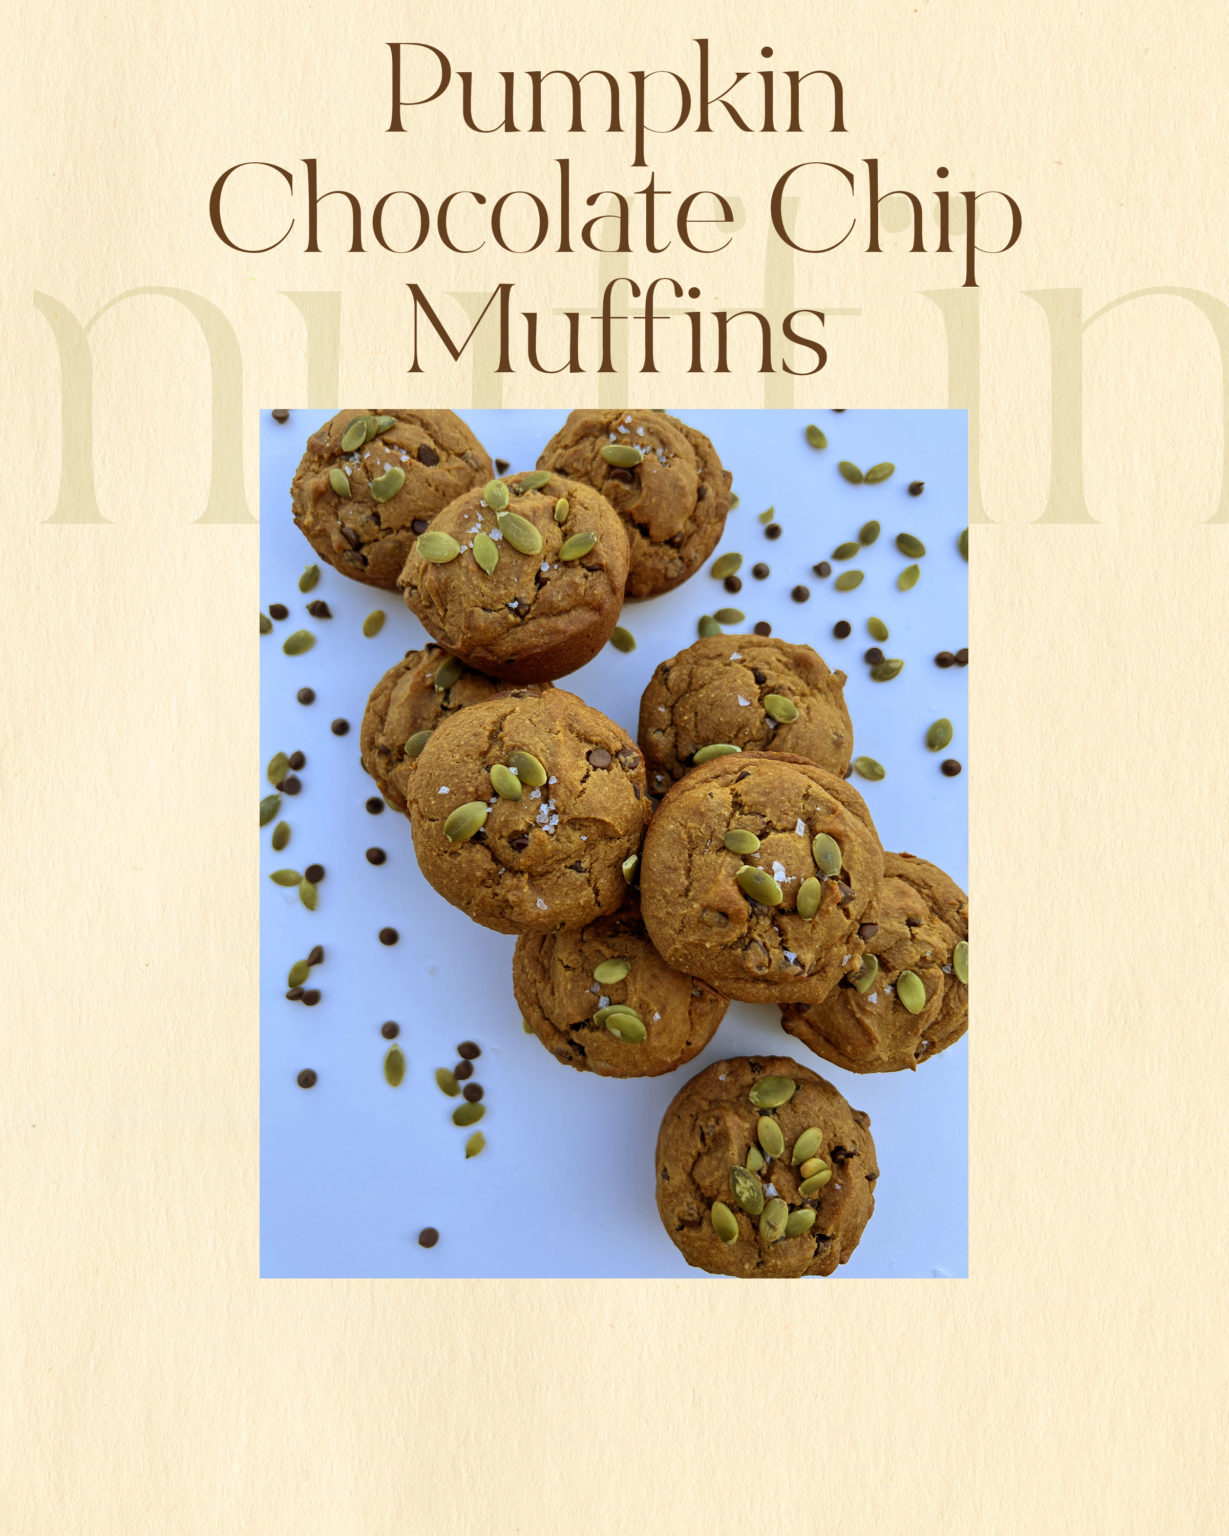
- ½ Cup Mini Vegan Chocolate Chips (Favorite Brand is Enjoy Your Life)
Instructions
- Preheat oven to 375 degrees
- In a small bowl, mix the 2 tablespoons of egg replacer or flax meal with the 5 tablespoons of water and let sit.
- I use one large bowl for all the wet and dry ingredients to make cleaning up a little easier. Start by mixing all the dry ingredients together first. Next, add the wet ingredients to the dry and fold together using a wooden spoon. Mix well but don’t overdo it. The goal is to fold the ingredients together without making your batter hard. You don’t want to over mix the batter because then your muffins won’t be fluffy!
- Add the egg replacer or flax egg mixture to the batter and stir until well mixed.
- Add the chocolate chips
- Spray muffin tin with non-stick spray
- Spoon the batter evenly into a 12-muffin tin pan. I don’t use paper liners because sometimes when you are baking with gluten-free flour, using liners is sticky. Use a good ceramic-based muffin pan that already has a good nonstick surface and make sure to spray the pan well with nonstick spray. When baking with gluten-free flours and using vegan ingredients, you won’t get the expansion that you get when baking with real eggs. For that reason, I fill my muffin tins almost to the top instead of ½ or ¾ like you would if your batter had egg in it.
- Bake for 20 minutes.
- Let cool before removing muffins from the pan.
I hope you guys love these muffins!! Let me know if you make them, I’d love to hear how they came out!
